DataTrue is a tool that enables you to audit, monitor and validate your tagging and analytics configuration. It checks for the presence (or absence) of tags, the validity of the data being passed to them and the contents of the data layer across your site.

Find out more here or contact us to talk about our reseller prices and testing services.
It supports three types of test: Coverage, Journey and Email.
Coverage Tests: It will crawl your site following each link on a page and checking the tagging and tracking on each one. Useful for sites with lots of templated pages, such as articles or content rich “magazine” sites.
Journey Tests: Configure a specific journey through your site, specifying button clicks and form data to progress through the different pages. Useful for ecommerce sites.
Email Tests: Send a marketing email to a DT email box and it will automatically follow the links in the email and check the channel parameters and tracking on the entry pages.
Tests are configured into Test Suites. A test suite can be scheduled to run hourly, daily or weekly and at a given time. The results of a scheduled run are sent by email.
Setting up a Coverage Test
Coverage Tests are straightforward and don’t require detailed configuration.
Create a new test, add a new step and select Coverage from the Action drop down.
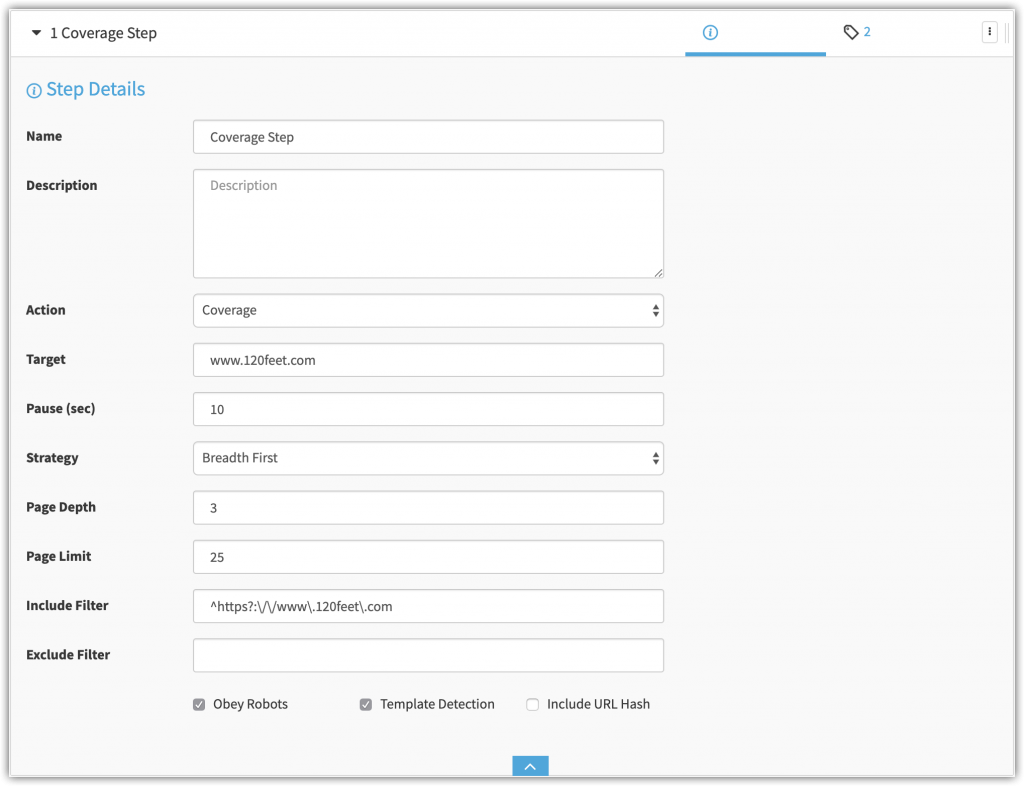
The options for this step are:
Target: This is the URL of the first page of the coverage test.
Pause: This is how long to wait on each page before going to the next one. You should make this long enough for all async tags on the page to load.
Strategy: Breadth First or Depth First controls whether the test will follow all links from the starting page before going back to the children pages and following their links, or whether it will go down the tree before coming back up to the top and starting down the next branch.
Page Depth: This is the number of children pages that the test will follow. If you have a “deep” site with lots of categories and sub categories this will need to be set at a higher number. If you have a very broad site with lots of pages hanging off the top level pages this can be a smaller number.
Page Limit: This is the limit of the number of pages that the crawler will hit.
Include Filter: Enter a regular expression to add finer control over which pages are included in the scan. For example, you might want to only include article pages or product related pages.
Exclude Filter: Enter a regular expression to add finer control over which pages are excluded from the scan. For example, you might want to exclude all account or checkout pages.
We usually add coverage steps to their own tests if they are the only step. However, you may want to create a test which checks coverage of several domains (or subdomains) in one test, so you could add multiple coverage steps to a single test.
Setting up a Journey Test
Journey tests usually consist of many steps – most of our ecommerce order journey tests are between 30 and 40 steps – and can be more involved than coverage steps. It will help to have a good understanding of XPath or CSS and jQuery.
The idea is to add a step for each page load and each page interaction. The page interaction step would be a button click or form element selection and will catch any custom link tracking that happens. The page load step then catches pages which load any page tracking.
A full ecommerce journey may be quite long and complex, which can be quite daunting. There is a Chrome extension which makes it easier; you activate the extension and then browse around the site and the steps are captured and saved.
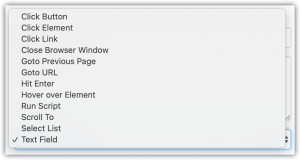
The options in the Action drop down allow the following events to be simulated:
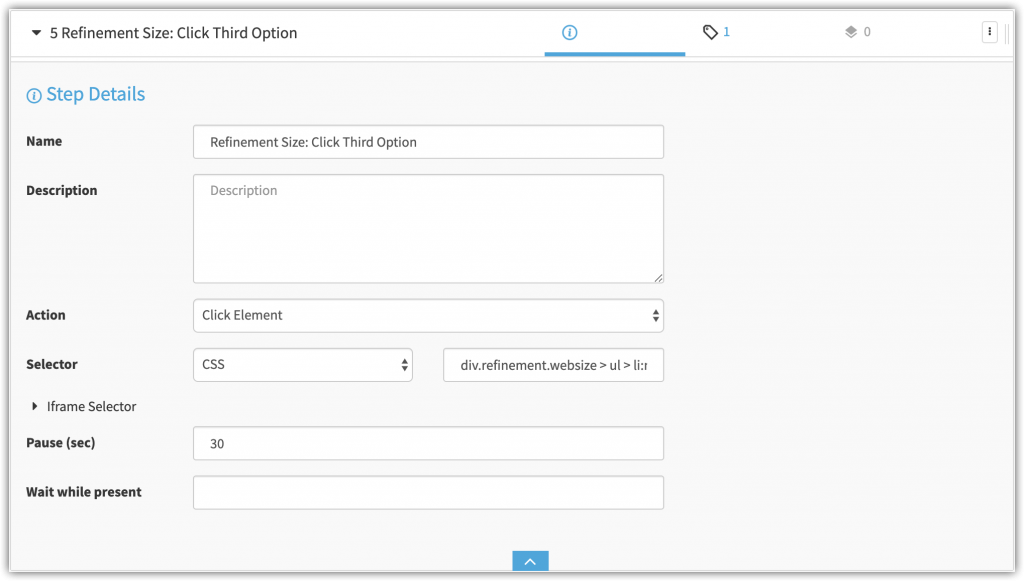
For most, you need to choose a type of selector (CSS, XPath, Element ID or Text) and the value of the selector.
The Chrome extension uses XPath and will give the full XPath selector from the top HTML element all the way down. These can often be simplified.
The Pause option allows you to wait a set number of seconds before carrying on, to give all the tags a chance to load.
The Wait while present option allows you to specify the CSS selector of a “please wait” modal or spinner, which may be present on the page while an asynchronous or API call is being made. This will force DataTrue to wait while this element is on the page and continue once it has disappeared.
Tips and Tricks
It is usually easier to allow DataTrue to find all the tags for you rather than entering all the details manually. However, this can take a couple of runs of the test before they are found:
- Add the steps (or use the Chrome extension).
- Save and Run the test. This is likely to involve a few iterations as you tweak the selectors.
- Click on the tag tab in the header of the step (1) and then click Discovered Tags link at the bottom (2). This will list all tags that were found on that step.

- Run the test again, this will look at the details of the tags that were added in the last step.
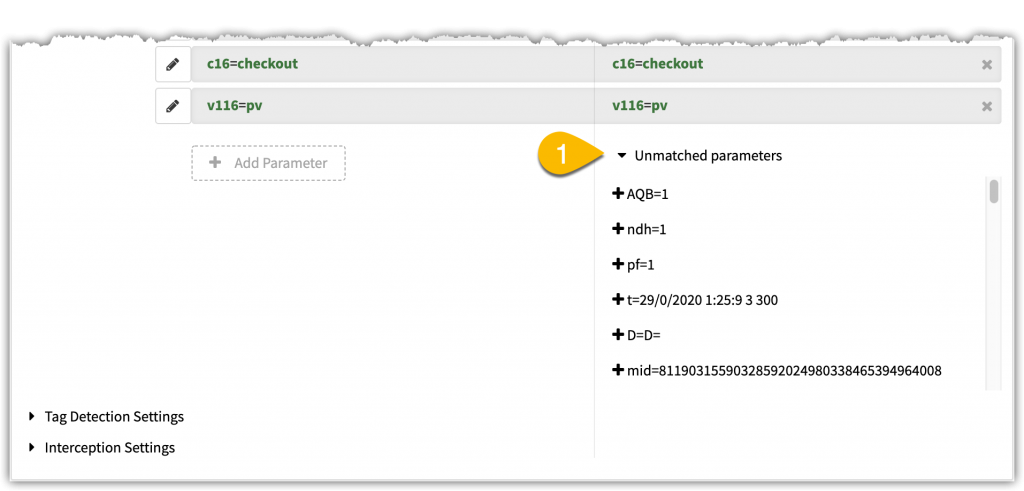
- Open the tag definition, scroll to the bottom of the panel and click the Unmatched Parameters link. This will open a list of all the parameters that were passed on that tag. They can be added to the tag validation by clicking on the plus next to each one.
- Run the test again and check the values. Some of the values will have been set based on values that were detected in the first run (ie session IDs) which will then cause validation errors. So, these need to be updated for subsequent runs.
Regular expressions are incredibly useful for the validation. If you are testing against a product catalogue where the order (or availability) of products changes regularly, your test may well be always loading the first product in the list. This means you can’t check for a specific product ID, or price, etc.
To use a regular expression, just tick the box in the validation configuration. The right hand side goes green as the detected value is matched by the regular expression.

When using CSS selectors, the code uses document.querySelector rather than jQuery, so there are some things that don’t work. And if there are multiple elements with the same class, this function only returns the first one.
If you want a step to be optional – for example click on a link that may not be present, but don’t fail if it isn’t present – then you can use XPath for the target, and add:
|//body
to the end of the xpath selector. This is effectively saying “or just the body”. The system will try the first selector first but if that is null then it will just simulate a click on the body element instead, and carry on with execution.
Add your TMS, Optimisation Tool and basic analytics configuration (GA, Adobe Analytics or both) to the Common Tag Variables definitions so you only have to configure them once. This means your tag validations can be much smaller and more direct as they only need to check for the things specific to that page. You can deactivate the Common Tag Variables for each individual step that doesn’t fire them (ie, button clicks probably won’t fire all the tags).
You can edit (and disable) tags from the Common Tag Variables against each step. But doing so will change it everywhere. This isn’t a “just this step” override feature.
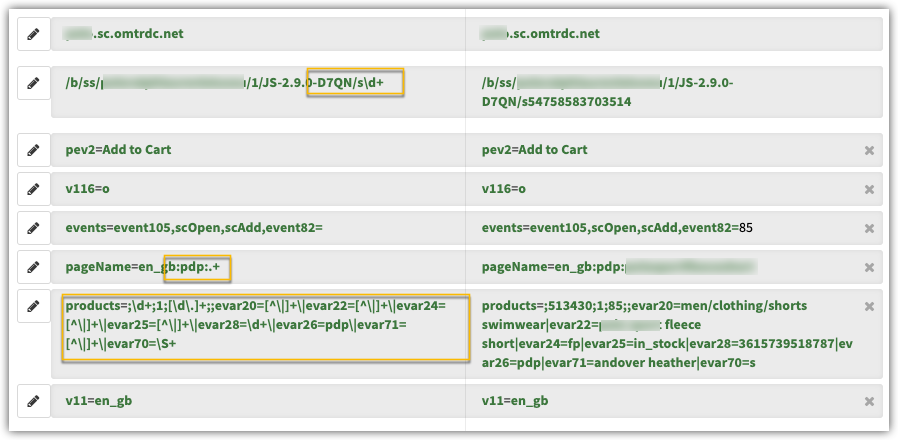
You can use multiple value validations for the same parameter. For example, on the Adobe Analytics tag if you’re using the Page Timing plug-in then you get nine Events passed on each page view as well as any custom events that you are tracking for that page. Rather than trying to validate the entire Events string in one go, you can split the validation into two rules:

This may also be useful for the product string. You could use one validation for the category, product id, price and quantity, another for the merchandising eVars and a third for the merchandising Events.
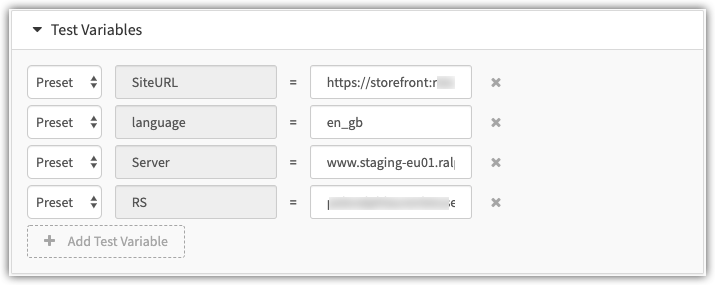
Test variables are useful for things that you may want to change regularly. For one of our clients we run all the tests regularly against the UK website but when new countries are launched we temporarily point the tests to the new staging site. Using test variables means we only have to make four changes and the test is completely reconfigured, even though we’re checking for things like the site language on every page view:
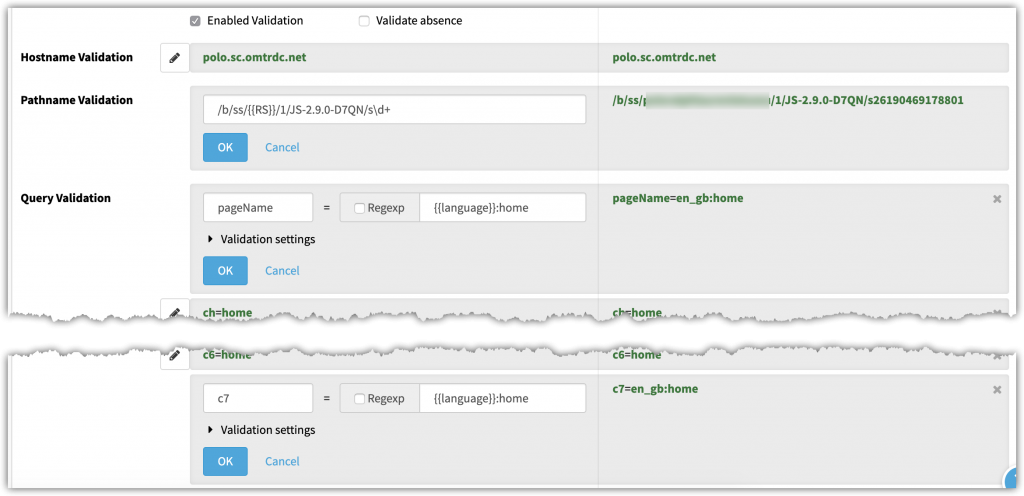
In the tag validation, use the syntax “{{variableName}}” to reference the variable. The automatic green validation highlighting doesn’t always work when you’re using a variable but when the test runs it will be fine.
There is a lot more depth to the tool, and the limits of what it can do are pretty much down to your imagination (and CSS selector abilities).
If this sounds like a tool that could benefit you and your team, then get in touch and let’s have a conversation about how we can help.
Ben Stephenson has worked as a consultant for 120Feet for four years. He has ten years of development experience on ecommerce websites, and five years of digital marketing experience as an ecommerce manager looking after a large multinational collection of websites for a Travel and Tourism company. In his spare time he plays guitar, builds with Lego and takes photos (sometimes featuring the guitar or the Lego).